
In part 4, we integrated our request form with the SharePoint list, using Microsoft Flow. In this post I’ll cover how to add an approval flow.

We’ll start up by navigating to flow.microsoft.com, and search for something like “SharePoint list”. We’re looking for a template called Start approval when a new item is added.
Since the SharePoint list is connected to the request form, this will allow us to start an approval process as soon as someone requests a team using the form.

The flow will need to connect to a few services, preferably using a licensed service account.

The template looks quite advanced, but don’t worry, we’ll go through it step by step.

Let’s start out by specifying the SharePoint list we created in part 3.

Next up we’ll need customize the template by adding a few variables and gather some information.
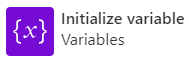
Let’s first click the + sign below the first action to add a new step…

…choose add an action, search for variable, and then choose Initialize variable from the list.
Repeat the above step until you have three variables, the type should be String, other than that we’ll leave these for later.
We’ll also add two new actions, one called Get user profile (V2) and one called Get manager (V2).

We’ll choose dynamic content from the SharePoint list, specifically the email address of the user who filled out the request form, which we stored in the Requestor/Owner Email column.
Next up we’ll customize the Start an approval action by adding the Mail attribute gathered from the Get manager (V2) action. We’ll also in Details specify the display name of the requester, previously stored in the Requestor/Owner DisplayName column of the SharePoint list.

At this point in the flow, an email will be sent to the users manager.
If you prefer that ie. IT handle these requests, just skip the Get manager (V2) action and add an email address manually.

You can see above that the manager has the option to either approve or reject, right from within the email.
Going back to flow, a condition action is used to allow for a different result based on whether the request is approved or not.

There’s no need to change anything in the condition action, so let’s move on to what will happen if the request is rejected.

Since we don’t want the rejection mail going to a service account, we’ll pull dynamic content from the Requestor/Owner Email column in the SharePoint list.

You might remember that we created a column called Status in the SharePoint list back in part 3? If you would like the list to reflect the current status of the request, add the SharePoint action called Update item.

Specify the appropriate site and list, and the item will pull the available columns from the list. Since this request was rejected, we’ll update the status with that.

That’s it for now, an email is sent to the requester, specifying that the request was rejected, and the SharePoint list item updated with the current status.

Rejection flow illustration
Next up we’ll cover the fun part, which is whatever happens when the request is approved!

Pingback: Take control of your Microsoft Teams environment part 4 | Teams.rocks
Pingback: Take control of your teams environment part 6 | Teams.rocks
Pingback: Take control of your Microsoft Teams environment part 7 | Teams.rocks